Documentation Menu

About Dreams LMS

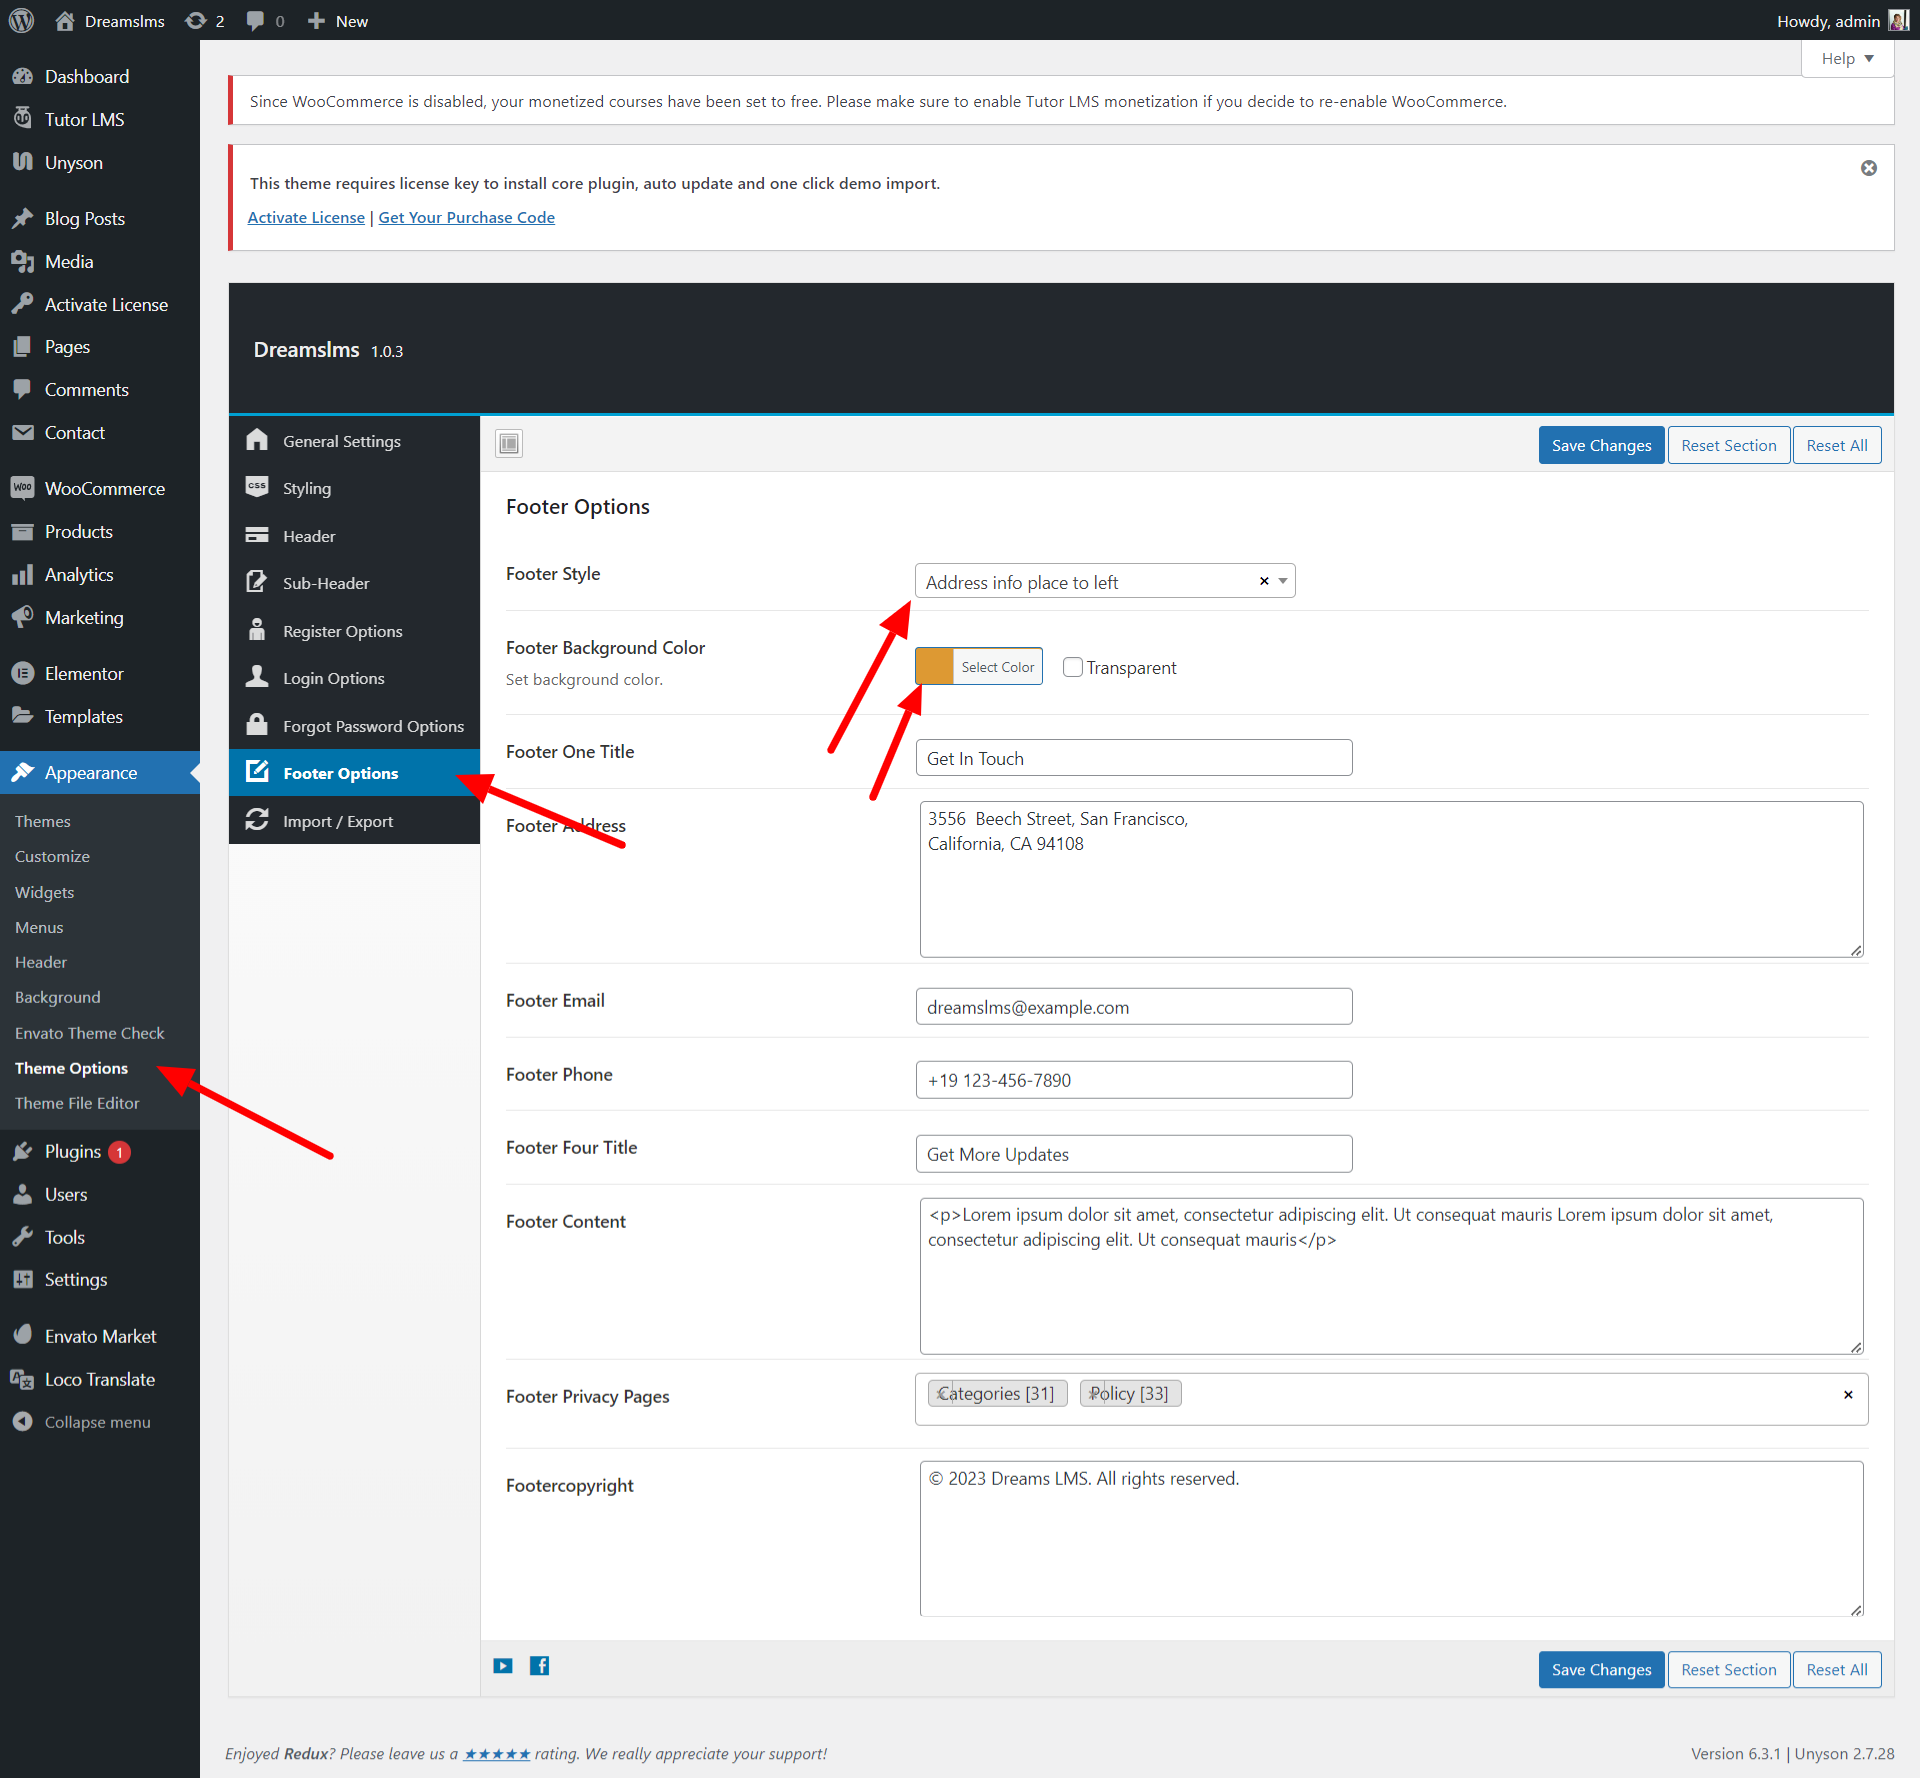
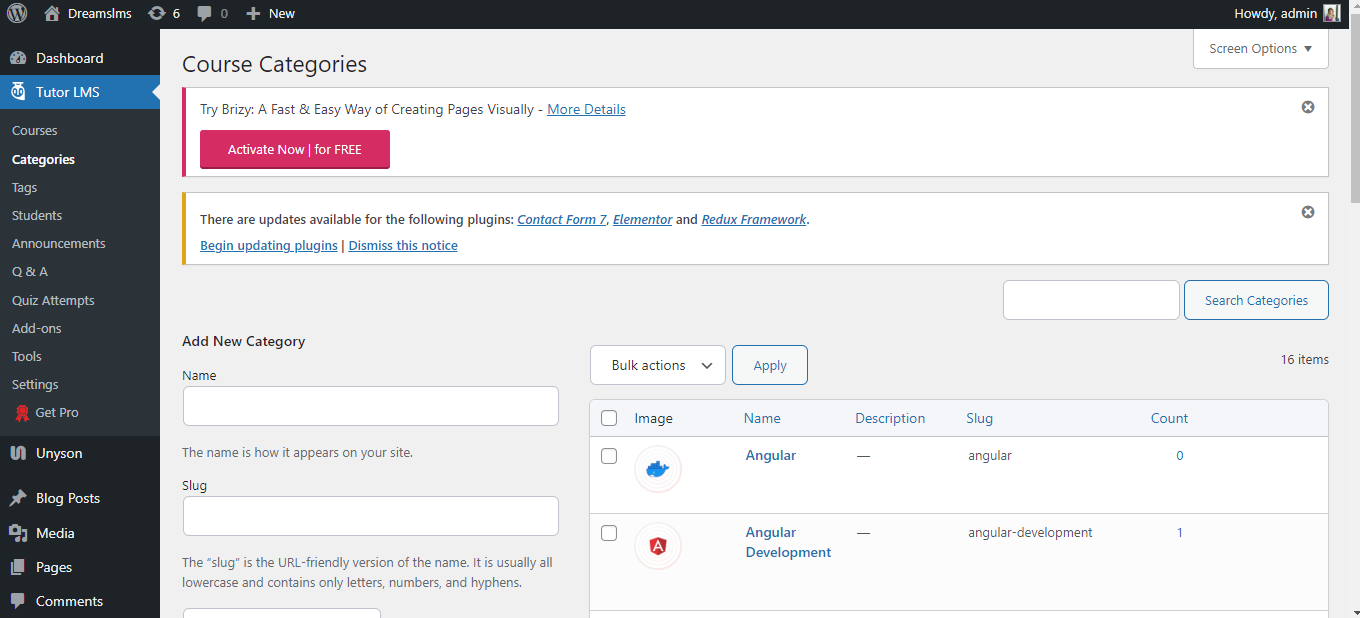
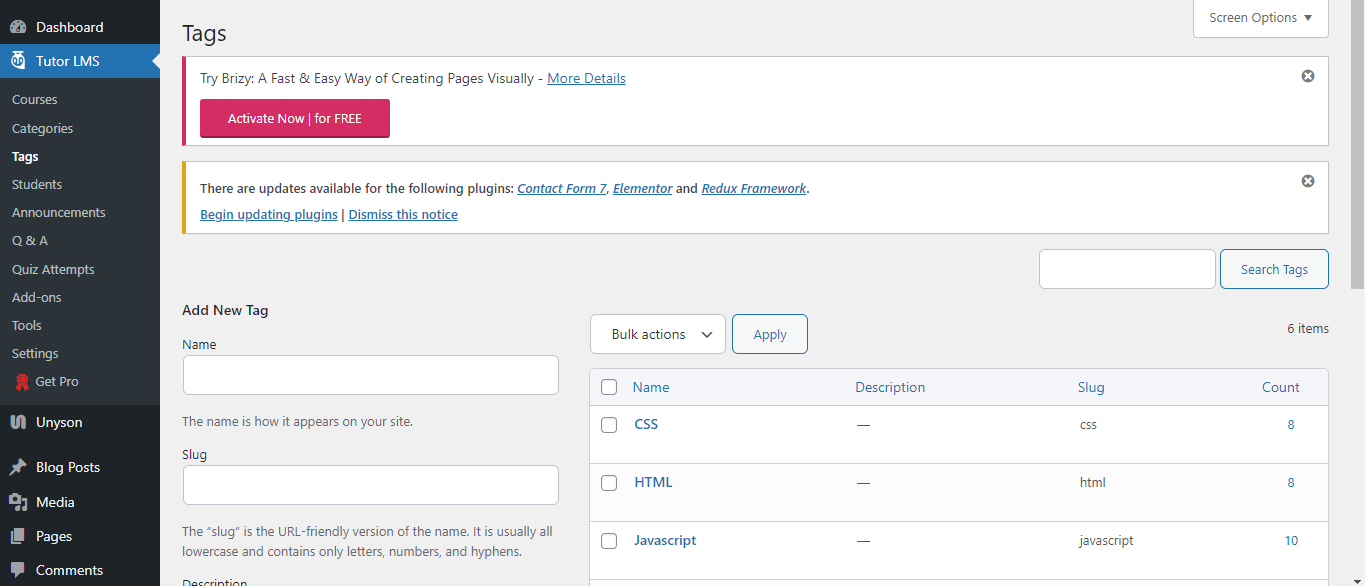
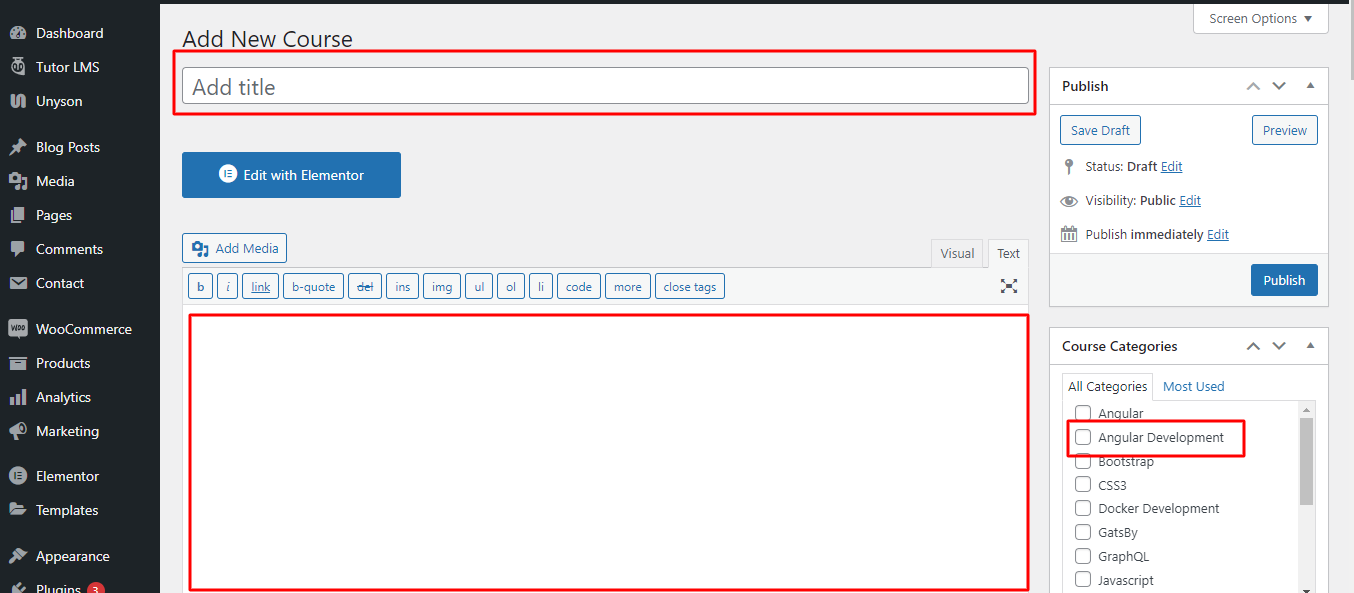
This documentation will provide you all the details you need to use the Dreams LMS theme and understanding of how Dreams LMS is structured and guide you in performing the most common features. If you require further assistance, related to topics not covered in this documentation, then please contact us via our support forum.

We assume that you already have WordPress installed and ready to go. If you do not, please see our section on WordPress to help you get started.

screenshot Dreams LMS

WordPress Instructions

To use this theme you need a working version of WordPress already installed on your server or the local environment. We have given the documentation links, where you will find the requirements and the other details about WordPress.

Theme Requirements

To use the Dreams LMS theme you need the latest version of WordPress, PHP Version 7 or higher, and MySQL 5 or higher. Apart from the necessary WordPress requirements here are listed recommended server configuration requirements to make the theme work properly.

  • PHP – Version 7.2 or higher
  • MySQL – Version 5.6 or higher ( OR MariaDB version 10.1 or higher)
  • memory_limit – 512M or higher
  • max_execution_time – 300 or higher
  • upload_max_filesize – 256M or higher
If you are not sure about the server requirements here is the quick guide on how you can easily change the server requirements. Changing server requirements. We still prefer contact your server provider for this.

What’s Included

In the product files we providing the theme files, required plugins for the theme.

Getting Support

Support is limited to questions regarding the theme’s features or problems with the theme. We are not able to provide support for code customizations or third-party plugins. If you need help with anything other than minor customizations of your theme then you should enlist the help of a developer.

Theme Installation

We assume that WordPress website is set, Now the next step is to install the theme. To get started with theme installation you’ll need to download the theme file. To download the theme file, go to Template Monster Downloads and locate the theme.

There are three ways to install the theme in you wordpress environment you can use any of them to install theme.

  • FTP Client – You can use the FTP Client for this.
  • Through WordPress – You can install it directly using WordPress theme installation.

FTP Installation

Follow the steps below to install via FTP.

Step 1 – Log into your web server with FTP client software

Step 2 – Unzip the Dreamslms.zip file and ONLY use the extracted Dreamslms theme folder

Step 3 – Upload the extracted theme folder into wp-content > themes folder

Step 4 – To Activate the newly installed theme. Go to Appearance > Themes and activate it.

WordPress Installation

Follow the steps below to install via WordPress.

Step 1 – Navigate to Appearance > Themes.

Step 2 – Click Install Themes and hit the upload button.

Step 3 – Navigate to find the “Dreamslms.zip” file on your systen and click “Install Now”

Step 4 – Activate the newly installed theme. Go to Appearance > Themes and activate it.

Demo Content

Before you start importing the demo content make sure you have installed all the required plugins for the theme so that demo content import properly. Here is the plugin list that you need to install and active before you start import. You will find them in ( Appearance > Install Plugins )

Note: Install & Activate plugins one by one

  • Elementor
  • Dreamslms Elementor
  • Dreamslms Widgets
  • Tutor LMS
  • Advanced Access Manager
  • Contact Form 7
  • Woocommerce
  • One Click Demo Import

Now for the demo import, you have to go to the ( Appearance > Import Demo Data ). Now click on the Import Demo Data and then click on Import Demo button and wait for some time your demo will be ready in a few minutes.

IMPORTANT NOTE

After Import demo content. Change the elementor settings. Go to (Elementor > Settings > Features Tab > Inline Font Icons change DEFAULT to INACTIVE).

Color Change

Color Change setting

Change primary and secondary color changes here

Courses

Courses

Admin can view all courses here

Courses Categories

Courses

Admin can view all courses categories here

Courses Tags

Courses

Admin can view all courses tags here

Add New Course

Course Title

you can add course title

Course Category

you can select course category

Course Tag

you can select course tag

Course Image

you can add course image

Courses Settings

you can manage all course related settings here.

Register Options

Using this register settings options, you can manage the register form caption and image

Register Image

you can add the register page image

Register Title

you can add the register page title

Register Slider

you can add the register page slides

Login Options

Using this login settings options, you can manage the login form caption and image

Login Image

you can add the login page image

Login Title

you can add the login page title

Login Slider

you can add the login page slides

Forgot Password Options

Using this forgotpassword settings options, you can manage the login form caption and image

Forgot Password Image

you can add the forgotpassword page image

Forgot Password Title

you can add the forgotpassword page title

Forgot Password Slider

you can add the forgotpassword page slides

Woocommerce Payments

Creating woocommerce product as course for booking process have the following steps

Create a product with same course name

Add price for product

  • Paypal Payment – general information Paypal Payment
  • Stripe Payment – general information Stripe Payment
  • Razorpay Payment – general information razorpay Payment
  • Language Module

    You can manage the wordpress language settings.

    Step 1 : Please install Loco Translate Click here

    Step 2 : Translate your theme

    Step 3 : Translate your theme required plugins same like theme

    Note : Please refer the right side image for your reference

    Source & Credits